Kids Hub How to Draw Hibicus
Hibiscus plants are known for their bright, beautiful blooms! They are symbolic of youth because they are short lived, bold and intense.
They really are a magnificent flower to draw so whatever your reason – have fun!
[Related Article: Pen & Watercolor Flowers Tutorials]
So, how can you do your own hibiscus flower drawing?
Hibiscus Flower Drawing: Step-By-Step
Step 1- Collecting your reference material
If you want to draw a hibiscus flower it is a good idea to get a clear and good quality reference image to work from.
Work from your imagination
You can work from your imagination, but the truth is that most people's brains leave out important information about the original flower. As a result, the flower may become more stylized or simplified than the original.
Learning to draw is easy if you know where to start. Hibiscus flowers can be rendered in so many different ways, from realistic to abstract hibiscus' – it really depends on what your preference is!
If you want to paint a flower or plant in a more abstracted or expressionistic manner, then it is absolutely fine to work with a more stylized, simplified drawing. In this case, drawing from your imagination would work well.
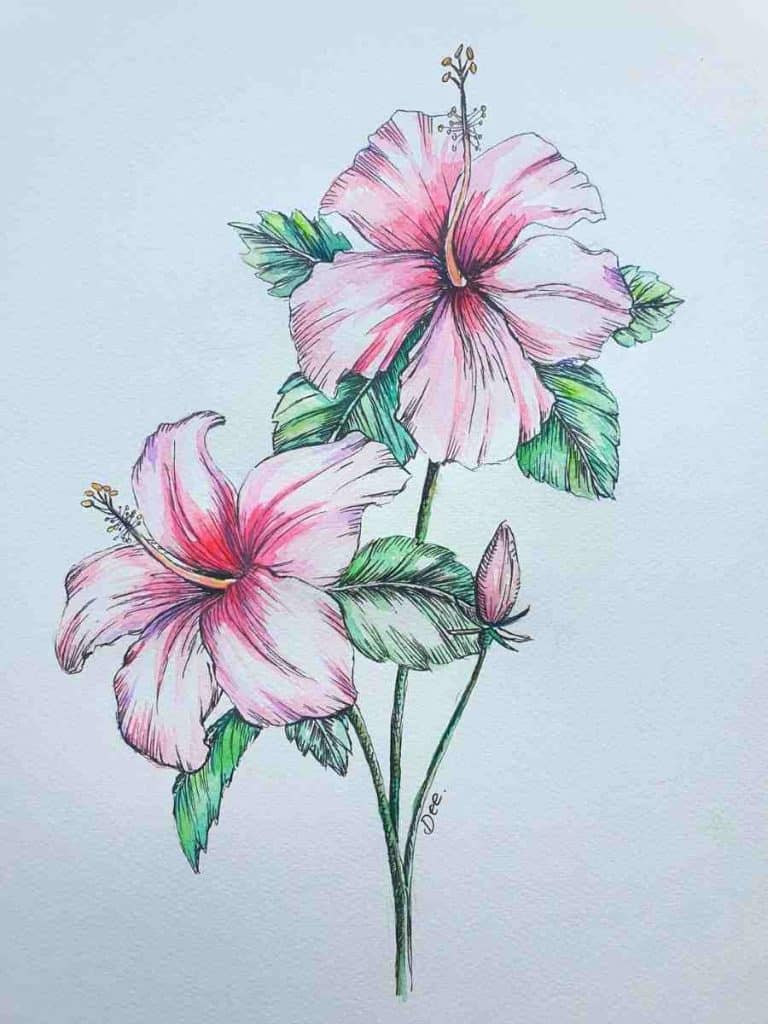
In this drawing demonstration, I wanted to capture the smaller details of the hibiscus plant, as well as the soft, pink, feminine aesthetic.
Work from your own photos
Drawing from your own photos is a great way to come up with unique ideas and compositions. You also have first-hand experience of what the lily looks like in a real-life situation. This gives you a better idea of how the subject matter "sits in space" so to speak.
Work from a free stock photo
Because I wanted a level of naturalism in my artwork, I chose to work from a photograph of a hibiscus plant that I found on unsplash.com.
If you cannot get your own photographs of your chosen subject matter, then you can always use free images from unsplash.com or pexel.com. There are a huge variety of free stock photo sites on the web, but these two are the ones I have used the most for good reference photos.
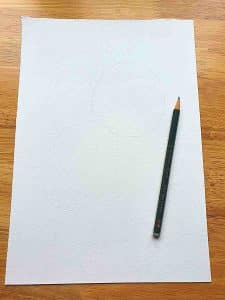
Step 2: Decide on the size of your drawing
I find that working on an A4 or A3 sheet of watercolor paper is a good size to start off with for botanical art. The hibiscus plant I painted is on an A4 sheet of paper.
I would recommend sticking to at least A4 in size, because if you work any smaller you may struggle to get a good amount of detail in your drawing or painting.
Interestingly enough, working on a larger surface is a lot easier than on a smaller surface.
With a larger sheet of paper, you can accentuate details and there is space to enlarge tiny areas. Your pencil marks and brush strokes can be wider and there is more room for error in a sense.
Step 3: Composition and rough drawing of the general shapes of the hibiscus plant
Once you have decided on the size of the paper you will be working on, you can think about your composition and then draw it out in pencil.
Think carefully about how you will position the hibiscus flowers on your page.
I recommend using a 2B lead pencil to first softly sketch out the general shapes of the hibiscus' petals, leaves, and stem. Make sure you are applying only a very light pressure onto the pencil to achieve very light pencil marks on the page.
I have start my hibiscus flower drawing by sketching out the general oval shapes that the flower heads will fit into.
Step 4: Defining Form
Once you have sketched the light general shapes of the hibiscus flowers, then you can start going over the petals, stem, and leaves again and making changes and alterations to your shapes in order to get your subject matter looking more accurate. I use a kneadable eraser because I find it great to be able to manipulate its shape so that I can erase lines in small places and awkward angles!
At this stage of the process, you can also use your artistic license to add elements like additional leaves, stems, or buds to your artwork to complete the composition. I added a flower bud and some leaves to my drawing in order to make the composition more balanced and more interesting for the viewer.
Step 5: Go over the pencil marks in pen
Once you have sketched the general shapes of the hibiscus flower and have a good idea of how it works together, then you can start going over your pencil lines with pen.
Because I am going to complete this illustration with watercolor washes, I have chosen a fine liner pen that is both permanent and waterproof. I like to use either the Faber Castell Pitt Pen XS to begin and then I move onto a size S nib later on when my shapes are more defined.
As you can see, I decided to start off by inking the stamens of the hibiscus flowers. The stamens and inner part can be quite challenging to get right when you draw or paint a hibiscus flower and so it's a good idea to get them clearly and neatly draw in first and then afterward draw the petals drawn around them.
I have left the little hairs on the stamen as solid black lines with small oval shapes (some are even circular) attached to the ends.
You will also see that when I start out drawing with my pen I 'sketch' with it. I like to have loose lines when I begin and as the drawing progresses the lines become more solid in certain areas.
Step 5: Begin shading
Remember to check where your light source is! This is so important in order to accurately draw forms and get a sense of three-dimensionality. Your shadows will fall opposite your light source.
You can see in the pictures I begin shading the petals of the hibiscus using hatching lines to building up shadow areas and define highlights. The shading is more dense towards the centre of the hibiscus flower and on the edge of some of the petals. This helps to give your petals a more three-dimensional appearance.
I then move on to shading the leaves using hatching as a shading technique once again. The hatching is more dense closer to the veins in the leaves, and less dense towards the wider, centre part of the leaves where the light falls.
There are several shading techniques you can use to shade in your hibiscus flower drawing – cross-hatching, hatching, scribbling, stippling and grading.
[Related Post: How to Improve your Drawing…Follow These Top Tips!]
I personally find that using combination of shading techniques to build up density of form and deepen my shadows works really well.
Step 6: Shade the stem and the bud, and final details
Continue to deepen your shading and shadows and use fine cross-hatching to create a sense of shadow on the stem and the bud of your hibiscus plant.
Carefully observe your drawing and deepen any shadows that need to be darker while lightening your highlighted areas. Use your kneadable eraser to remove final pencil marks in order to lighten specific areas.
If you would like to take your pencil drawing a step further, you can add color to the hibiscus flowers by applying soft washes of watercolor paint over the pen.

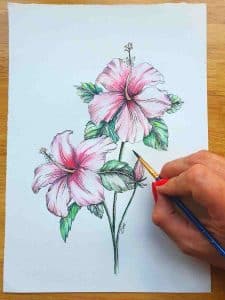
Step 8: Paint washes of your lightest color
As you begin painting with watercolor you will be using a technique called wet-on-dry. Essentially that means you are putting paint on your paintbrush and then painting directly onto the dry surface of the page. This is a good way to start because you have more control over the areas you are painting color.
Once you have defined your shapes using your initial color you can then work into them using a technique called wet on wet.
Wet on wet is where you paint you paint your watercolor paint onto a watery surface. The color then blooms and bleeds and creates interesting washes of color. This is less controlled than wet-on-dry, but I love watching how the watercolor pigment creates gorgeous textures and patterns as it dries.
I started by painting very soft washes of rose pink over the petals of the hibiscus flowers.

[Related Post: How to Paint Gorgeous Cherry Blossoms]
Step 9: Layers of washes to darker areas of the flowers
Continue to paint layers of washes on top of one another to build up depth and deepen shadow areas. As you can see, I used a deep blue over some shadow areas to add interest and depth to the petals.

Step 10: Washes of green on the stems and the leaves
Paint light washes of green on the stem.
Step 11: Final Details
Lastly I painted an orange wash over the stamens and also painted the tips of the hairs with yellow. I chose to use these colors so that the stamen stood out against the background of the petals.
Remember the following when you draw a hibiscus flower…
Stand Back
Make sure to stand back regularly to observe how your drawing is developing. It is also important that you give yourself mental and visual breaks so that you can continue to draw accurately.
Sharp Pencil
Remember to keep your pencil sharp. This is important because often we get so engrossed in our drawing that we forget that a sharp pencil helps with fine lines and details.
Play & Experiment
It is a good idea to always have a scrap piece of paper nearby, in order to test out your shapes and shading techniques while you draw a hibiscus flower.
Other ways to use a Hibiscus Drawing
Once you have practiced how to draw a hibiscus flower you can use this skill for hibiscus flower tattoos, hibiscus painting printables, hibiscus flower crafts, or even as a coloring page! Many people really enjoy creating their own personal coloring page to use as a meditative tool!
List of materials and supplies needed to do your own Hibiscus Flower Drawing
The Best Painting and Drawing Supplies for Artists
2B, 4B, 6B, and 8B Pencil
Kneadable Eraser
Scrap piece of paper for testing colors
300gsm Watercolor Paper
If you want to add a wash to your drawing you should definitely do your drawing on a good-quality, heavy paper that doesn't buckle.
Soft Bristle Round or Filbert Brush
Watercolor pans or tubes
I am currently using the Windsor and Newton Watercolor Pan. The colors are rich and the tray itself is portable and easy to use.

Conclusion
Drawing is a rewarding and fun hobby that can help you improve many skills, like coordination, focus, creativity, and patience. You don't need any fancy art supplies or tools to get started – just paper, pencils (or pens), erasers if needed, and some watercolor paints. If you enjoyed reading this blog post on how to draw hibiscus flowers step by step then make sure you follow my blog for more creative inspiration and tutorials!
Drawing a hibiscus is a fun and easy sketching project for beginners as well as more advanced artists. This tutorial is one of the many I have written to help you to draw. I hope you have found my advice on techniques and materials useful as you begin your own hibiscus flower drawing!
Source: https://artsydee.com/hibiscus-flower-drawing/
Postar um comentário for "Kids Hub How to Draw Hibicus"